In my previous blog post I described how you can run MRI Ruby on AWS Lambda. In this article I'll guide you through adding gems to the project: first faker, and then the mysql2 gem with activerecord, and finally we will have the Ruby code talk to an RDS instance, all this through an AWS Lambda.
I recorded all my changes in this project, feel free to jump in where you want, you'll find commit points after each section.
1. Add faker to the project
You can pick up the changes from the previous blog post here. Let's start by editing our Ruby app, add a Gemfile to it in the hello_ruby directory:
source 'https://rubygems.org'

gem 'faker'
Run BUNDLE_IGNORE_CONFIG=1 bundle install --path vendor in that directory. The --path vendor argument is important, as we have to package all the files in the vendor directory. Make sure the BUNDLED WITH part of your Gemfile.lock is not there as that can cause you some pain when you deploy your code to AWS Lambda.
Edit the lib/hello.rb file like this:
#!/usr/bin/env ruby

require 'faker'

puts "Hello - '#{Faker::Name.name}' from Ruby!"
We required the faker gem and used it to generate a fake name. Run the app in the terminal with bundle exec ruby lib/hello.rb command.
Hello - 'Jamar Gutmann II' from Ruby!
You will get a different name between the single quotes, but that's the point, faker generates a random name for us.
2. Use faker with Traveling Ruby
The run target in the Makefile will have to copy all vendorized gems, plus it needs to configure the app to run with the correct bundler settings. This step is heavily influenced by how Traveling Ruby packages gems for deployment, please review their tutorial as reference.
Add a bundler_config template file to the resources directory with this content:
BUNDLE_PATH: .
BUNDLE_WITHOUT: development:test
BUNDLE_DISABLE_SHARED_GEMS: '1'
Change the resources/wrapper.sh file to set the Gemfile’s location:
#!/bin/bash
set -e

# Figure out where this script is located.
SELFDIR="`dirname \"$0\"`"
SELFDIR="`cd \"$SELFDIR\" && pwd`"

# Tell Bundler where the Gemfile and gems are.
export BUNDLE_GEMFILE="$SELFDIR/lib/vendor/Gemfile"
unset BUNDLE_IGNORE_CONFIG

# Run the actual app using the bundled Ruby interpreter, with Bundler activated.
exec "$SELFDIR/lib/ruby/bin/ruby" -rbundler/setup "$SELFDIR/lib/app/hello.rb"
Modify the Makefile's run target with the following changes:
...

run: ## Runs the code locally
    @echo 'Run the app locally'
    @echo '-------------------'
    @rm -fr $(OSXDIR)
    @mkdir -p $(OSXDIR)/lib/ruby
    @tar -xzf resources/traveling-ruby-20150715-2.2.2-osx.tar.gz -C $(OSXDIR)/lib/ruby
    @mkdir $(OSXDIR)/lib/app
    @cp hello_ruby/lib/hello.rb $(OSXDIR)/lib/app/hello.rb
    @cp -pR hello_ruby/vendor $(OSXDIR)/lib/
    @rm -f $(OSXDIR)/lib/vendor/*/*/cache/*
    @mkdir -p $(OSXDIR)/lib/vendor/.bundle
    @cp resources/bundler-config $(OSXDIR)/lib/vendor/.bundle/config
    @cp hello_ruby/Gemfile $(OSXDIR)/lib/vendor/
    @cp hello_ruby/Gemfile.lock $(OSXDIR)/lib/vendor/
    @cp resources/wrapper.sh $(OSXDIR)/hello
    @chmod +x $(OSXDIR)/hello
    @cd $(OSXDIR) && ./hello

...
Run the target with make run and you should see something similar to this in the terminal:
$: make run
Run the app locally
-------------------
Hello - 'Kelly Huel' from Ruby!
We've just run the app with Traveling Ruby's Ruby interpreter, and we used the faker gem's functionality as well!
3. Deploy the app with faker to AWS Lambda
In order to run your app in AWS Lambda, you only need to change the package target in your Makefile, everything else, the delete, create, invoke targets should remain the same. Change the file like this:
...

package: ## Package the code for AWS Lambda
    @echo 'Package the app for deploy'
    @echo '--------------------------'
    @rm -fr $(LAMBDADIR)
    @rm -fr deploy
    @mkdir -p $(LAMBDADIR)/lib/ruby
    @tar -xzf resources/traveling-ruby-20150715-2.2.2-linux-x86_64.tar.gz -C $(LAMBDADIR)/lib/ruby
    @mkdir $(LAMBDADIR)/lib/app
    @cp hello_ruby/lib/hello.rb $(LAMBDADIR)/lib/app/hello.rb
    @cp -pR hello_ruby/vendor $(LAMBDADIR)/lib/
    @rm -f $(LAMBDADIR)/lib/vendor/*/*/cache/*
    @mkdir -p $(LAMBDADIR)/lib/vendor/.bundle
    @cp resources/bundler-config $(LAMBDADIR)/lib/vendor/.bundle/config
    @cp hello_ruby/Gemfile $(LAMBDADIR)/lib/vendor/
    @cp hello_ruby/Gemfile.lock $(LAMBDADIR)/lib/vendor/
    @cp resources/wrapper.sh $(LAMBDADIR)/hello
    @chmod +x $(LAMBDADIR)/hello
    @cp resources/index.js $(LAMBDADIR)/
    @cd $(LAMBDADIR) && zip -r hello_ruby.zip hello index.js lib/
    @mkdir deploy
    cd $(LAMBDADIR) && mv hello_ruby.zip ../deploy/
    @echo '... Done.

...
The added rows are very similar to the ones we had to add to run the app locally with Traveling Ruby. Delete the lambda function and recreate it by using the Makefile. When you invoke it, your should see something like this:
START RequestId: 3f6ae8f5-23c1-11e6-9acc-0f50ffa39e9b Version: $LATEST
2016-05-27T04:12:41.473Z
  3f6ae8f5-23c1-11e6-9acc-0f50ffa39e9b
    Hello - 'Mrs. Lelah Bradtke' from Ruby!

END RequestId: 3f6ae8f5-23c1-11e6-9acc-0f50ffa39e9b
REPORT RequestId: 3f6ae8f5-23c1-11e6-9acc-0f50ffa39e9b
       Duration: 3425.01 ms
       Billed Duration: 3500 ms
       Memory Size: 512 MB
       Max Memory Used: 65 MB
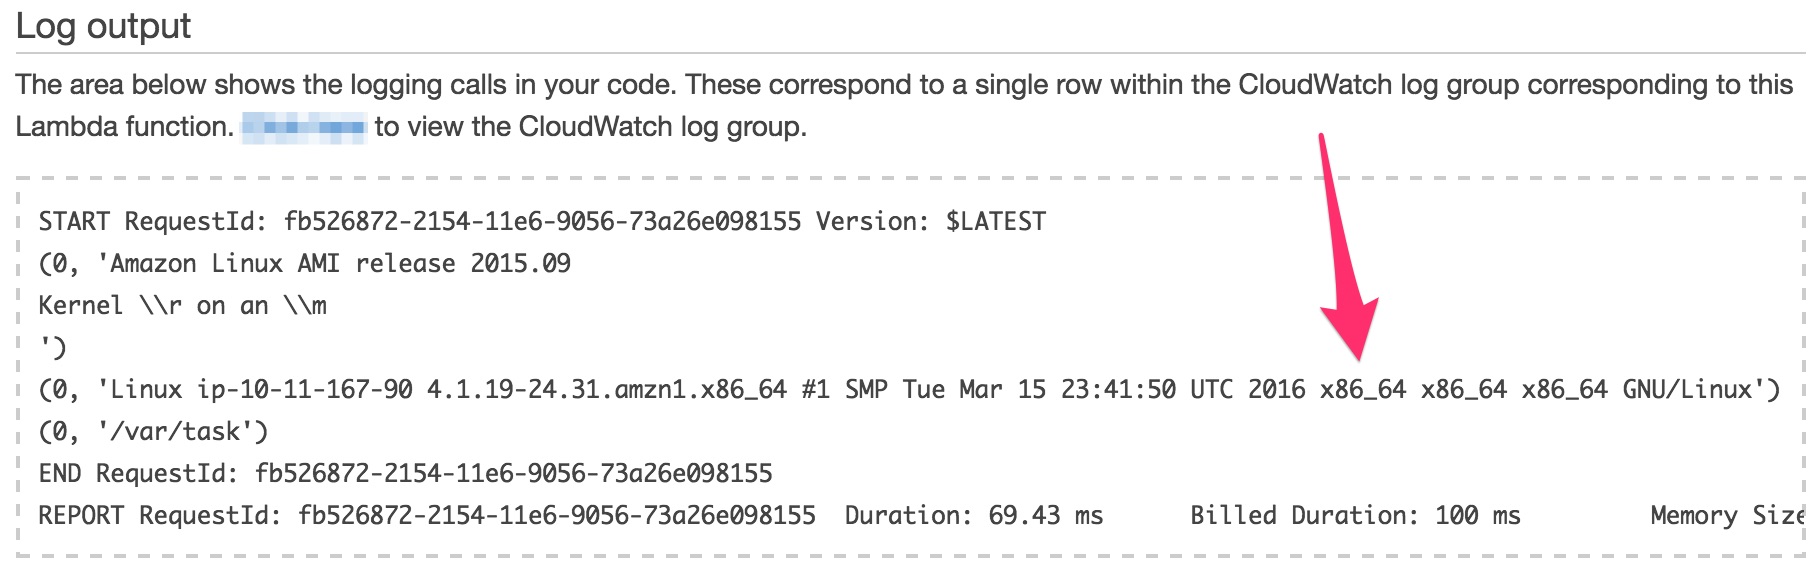
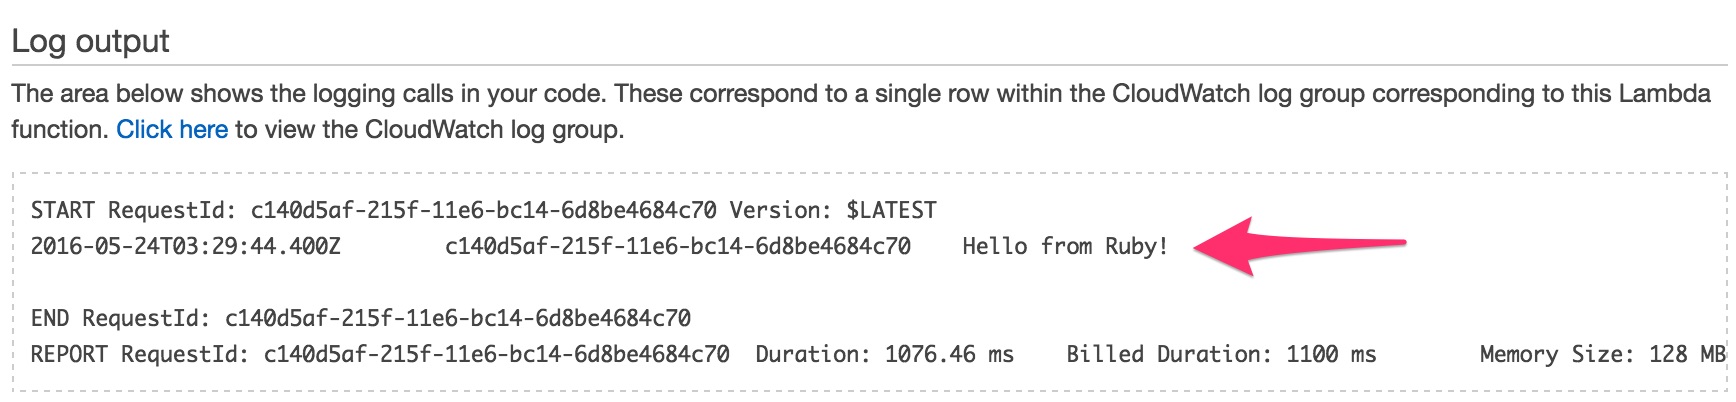
The Hello - 'xyz' from Ruby! string contains the Faker gem generated name. You can also invoke the Lambda function through the AWS Management Console, you should see something similar to this in the Log output section:

4. Publish a newer version to AWS Lambda
Dropping and recreating the Lambda function works, but it's not the most effective solution. AWS allows you to update your function which we'll do with this new target in the Makefile:
...

publish: package ## Deploys the latest version to AWS
        aws lambda update-function-code \
                --function-name HelloFromRuby \
                --zip-file fileb://./deploy/hello_ruby.zip

...
This target will let you update the function code. It also calls the package target to make sure your latest changes will be deployed to AWS.
5. Create a new RDS database with one table
Add this script to your Makefile, it will create a minimal RDS instance for you, you can drop that instance, connect to the DB and drop/create the database with some seed data in it.
DBPASSWD=Kew2401Sd
DBNAME=awslambdaruby

...

create-rds-instance: ## Creates an RDS MySQL DB instance
    aws rds create-db-instance \
        --db-instance-identifier MyInstance01 \
        --db-instance-class db.t1.micro \
        --engine mysql \
        --allocated-storage 10 \
        --master-username master \
        --master-user-password $(DBPASSWD)

delete-rds-instance: ## Deletes an RDS MySQL DB instance
    aws rds delete-db-instance \
        --db-instance-identifier MyInstance01 \
        --skip-final-snapshot

db-connect: ## Connects to the RDS instance
    mysql --user=master --password=$(DBPASSWD) --host myinstance01.cgic5q3lz0bb.us-east-1.rds.amazonaws.com

create-db: ## Creates a DB with a table and records
    @echo "Dropping  and creating database"
    @echo "-------------------------------"
    @mysql -u master --password='$(DBPASSWD)' --host myinstance01.cgic5q3lz0bb.us-east-1.rds.amazonaws.com -e "DROP DATABASE IF EXISTS $(DBNAME)" > /dev/null 2>&1
    @mysql -u master --password='$(DBPASSWD)' --host myinstance01.cgic5q3lz0bb.us-east-1.rds.amazonaws.com -e "CREATE DATABASE $(DBNAME)" > /dev/null 2>&1
    @mysql -u master --password='$(DBPASSWD)' --host myinstance01.cgic5q3lz0bb.us-east-1.rds.amazonaws.com $(DBNAME) < resources/schema.sql > /dev/null 2>&1
    @mysql -u master --password='$(DBPASSWD)' --host myinstance01.cgic5q3lz0bb.us-east-1.rds.amazonaws.com $(DBNAME) < resources/seed.sql > /dev/null 2>&1
    @echo "... Done"

...
Create the RDS instance first, AWS will need some time to initialize it. Allow incoming connections to it by adjusting the "Inbound" traffic through your own IP under your Security Group:
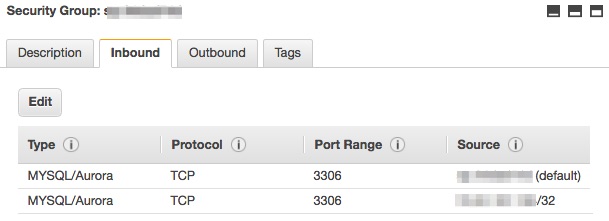
You can connect to the RDS instance through the mysql console using the db-connect target. You'll need to adjust the hostname to yours. Once that works out, use the create-db target to create a DB with a table and add two records to it. If all goes well, this is what you should see when you query the users table in the MySQL console:
mysql> SELECT * FROM users;
+----+--------+------------------+-----------+----------+
| id | login  | email            | firstname | lastname |
+----+--------+------------------+-----------+----------+
|  1 | jsmith | jsmith@gmail.com | John      | Smith    |
|  2 | bjones | bjones@gmail.com | Bob       | Jones    |
+----+--------+------------------+-----------+----------+
2 rows in set (0.04 sec)
6. Connect to MySQL with Rails' ActiveRecord
Add the mysql2 and active_record gems to the Ruby app's Gemfile:
gem 'activerecord'
gem 'mysql2', '0.3.18'
We need to use the 0.3.18 version of the mysql2 gem, as that comes packaged with Traveling Ruby. Run bundle install to get the new gems via Bundler.
Modify the lib/hello.rb file to have this:
#!/usr/bin/env ruby

require 'faker'
require 'active_record'

ActiveRecord::Base.establish_connection(
  :adapter  => "mysql2",
  :host     => "myinstance01.cgic5q3lz0bb.us-east-1.rds.amazonaws.com", # use your instance name
  :username => "master",
  :password => "Kew2401Sd",
  :database => "awslambdaruby"
)

class User < ActiveRecord::Base
end

puts "Number of users: #{User.count}"
puts "First user: #{User.first.firstname} #{User.first.lastname}"
puts "Hello - '#{Faker::Name.name}' from Ruby!"
You need to adjust the :host value to your RDS instance host name as mine won't work for you. You'll know that everything is set up properly when you see this in the terminal:
$: bundle exec ruby lib/hello.rb
Number of users: 2
First user: John Smith
Hello - 'Miss Darrick Powlowski' from Ruby!
7. Use Traveling Ruby’s packaged mysql gem
You need to download the Traveling Ruby packaged mysql2 gem from their S3 bucket. Let’s put it into our resources directory.
Modify the package target like this:
...

package: ## Packages the code for AWS Lambda
    @echo 'Package the app for deploy'
    @echo '--------------------------'
    @rm -fr $(LAMBDADIR)
    @rm -fr deploy
    @mkdir -p $(LAMBDADIR)/lib/ruby
    @tar -xzf resources/traveling-ruby-20150715-2.2.2-linux-x86_64.tar.gz -C $(LAMBDADIR)/lib/ruby
    @mkdir $(LAMBDADIR)/lib/app
    @cp hello_ruby/lib/hello.rb $(LAMBDADIR)/lib/app/hello.rb
    @cp -pR hello_ruby/vendor $(LAMBDADIR)/lib/
    @rm -fr $(LAMBDADIR)/lib/vendor/ruby/2.2.0/extensions
    @tar -xzf resources/mysql2-0.3.18-linux.tar.gz -C $(LAMBDADIR)/lib/vendor/ruby/
    @rm -f $(LAMBDADIR)/lib/vendor/*/*/cache/*
    @mkdir -p $(LAMBDADIR)/lib/vendor/.bundle
    @cp resources/bundler-config $(LAMBDADIR)/lib/vendor/.bundle/config
    @cp hello_ruby/Gemfile $(LAMBDADIR)/lib/vendor/
    @cp hello_ruby/Gemfile.lock $(LAMBDADIR)/lib/vendor/
    @cp resources/wrapper.sh $(LAMBDADIR)/hello
    @chmod +x $(LAMBDADIR)/hello
    @cp resources/index.js $(LAMBDADIR)/
    @cd $(LAMBDADIR) && zip -r hello_ruby.zip hello index.js lib/ > /dev/null
    @mkdir deploy
    @cd $(LAMBDADIR) && mv hello_ruby.zip ../deploy/
    @echo '... Done.'

...
We need to replace the content of the 2.0.0/extensions directory with the Traveling Ruby's Linux version, as the one copied there is OSX specific.
AWS Lambda has an IP address other than your IP. In order to make it easy for you now, (and don't do this anywhere else), I'd suggest making your AWS Instance available without IP restriction. Do this only temporarily, to test things out, remove this Inbound rule once you've seen your Lamba working. You can specify the VPC your Lambda has access to, but the topic of AWS Lambda security would need another blog post just in itself.
This is how I opened up my RDS instance for any IP out there:

If everything is configured properly, you should see something like this in your terminal when you call the Lambda function with the make invoke command:
% make invoke
rm -fr tmp && mkdir tmp
aws lambda invoke \
        --invocation-type RequestResponse \
        --function-name HelloFromRuby \
        --log-type Tail \
        --region us-east-1 \
        --payload '{"name":"John Adam Smith"}' \
        tmp/outfile.txt \
        | jq -r '.LogResult' | base64 -D
START RequestId: 8444ede9-26d8-11e6-954c-fbf57aab89fb Version: $LATEST
2016-05-31T02:36:50.587Z        8444ede9-26d8-11e6-954c-fbf57aab89fb
Number of users: 2
First user: John Smith
Hello - 'Jeanne Hansen' from Ruby!

END RequestId: 8444ede9-26d8-11e6-954c-fbf57aab89fb
REPORT RequestId: 8444ede9-26d8-11e6-954c-fbf57aab89fb
Duration: 5072.62 ms
Billed Duration: 5100 ms
Memory Size: 512 MB
Max Memory Used: 53 MB
Sweet! The Ruby code in this AWS Lambda function reports back 2 users and correctly displays the first record.
Being able to use MRI Ruby with gems opens up a ton possibilities for us (and I hope for you as well). AWS Lambdas are neat little workers that can scale up and down very well. It's much easier to launch a 1000 AWS Lambdas at the same time than running Ruby processes with resque or sidekiq on worker boxes.