Sunday, November 13, 2016

Recursion Done Right - Haskell Influenced Recursion in Ruby

Learning Haskell has influenced the way I think about code. I wrote about currying before in various languages, but Haskell taught me a bit about how to do recursion properly.

Although fast paced, I really like the examples in the book Learn you a Little Haskell for Great Good. As one chapter talks about recursion and higher order functions, I was amazed by the simplicity of the code that lets you do basic list operations.

Here is how one could find the maximum of a list:

maximum' :: (Ord a) => [a] -> a
maximum' [] = error "maximum of an empty list"
maximum' (x:xs) = max x (maximum' xs)

There is already a maximum function in Haskell's core library, this example just shows you what you need to do to implement it yourself.

I am not going into details about the type declaration, but there are a couple of points I'd like to talk about. The pattern matching in the second line checks for the case, where the collection is an empty array. When that happens, an exception is thrown. The last line does pattern matching as well, it grabs the head and the tail of the list and saves it into the x and xs variables. Then it uses the max functions to figure out which number is greater: x or the recurred result of maximum' with the tail of the list. This is a prime example of declarative code, its simplicity is striking and the fact that I don’t have to know how max works with the recursion makes it a joy to read.

Let’s look at another example. Here is how you could implement map in Haskell yourself:

map' :: (a -> b) -> [a] -> [b]
map' f [] = []
map' f (x:xs) = f x : map' f xs

Similarly, the edge-case is handled first. The last line has the logic, function f is applied to the head of the list, the result is concatenated with the recurred result of map' of f function and the tail of the list.

All right, let’s see how we could express this logic in Ruby.

Here is my first attempt:

module Collections
  def self.maximum(collection)
    head = collection.first
    tail = collection[1..-1]

    return 0 unless tail
    max head, (maximum tail)
  end

  def self.max(a, b)
    a > b ? a : b
  end
  private_class_method :max
end

RSpec.describe 'Recursion done right' do
   context 'maximum' do
     it 'returns an empty array as max of empty list' do
       expect(Collections.maximum([])).to eq(0)
     end

    it 'returns the maximum of a list' do
      expect(Collections.maximum([1,3,2])).to eq(3)
    end
  end
end

I did not find a max method in Ruby, I added that as a private class method. This is still pretty easy to read, but a bit more verbose than what I'd like it to be. I wanted to find the (x:xs) head-tail (car-cdr for you LiSP folks) equivalent in Ruby, I knew that will be key to make it a more succinct solution. This is it: (head, *tail) = collection. I also had to change the guard to quit from the recursion to look for an empty array, as the splat operator will provide that.

Here is my revised solution:

module Collections
  def self.maximum(collection)
    (head, *tail) = collection

    return 0 if tail.empty?
    max head, (maximum tail)
  end
  ...
end

This is better, but the destructuring can take place in the argument:

module Collections
  def self.maximum((head, *tail))
    return 0 if tail.empty?
    max head, (maximum tail)
  end
  ...
end

This is pretty darn close to the solution in Haskell.
Now let’s look at the map function.

These specs describe the behavior:

context 'map' do
  it 'mapping [] with (*3) gives []' do
    expect(Collections.map(->(x){ x*3 }, [])).to be_empty
  end
  it 'mapping [1,2,3] with (*3) gives [1,6,9]' do
    expect(Collections.map(->(x){ x*3 }, [1,2,3])).to eq([3,6,9])
  end
end

My implementation of map takes a lambda with one argument, which multiplies that one argument by three, and the second argument is the collection of items the map function will operate on.

This is my implementation for it:

module Collections
  def self.map(f, (head, *tail))
    return [] unless head

    [f.(head)] + map(f, tail)
  end
  ...
end

The key to make it concise is the destructuring the collection argument into head and tail. The guard statement makes sure the recursion will quit once there is no item in the head. The bulk of the logic is the last line of the method: the lambda is applied to the head, it's converted into an array and that value is concatenated with the result of the recurred result of the lambda and the rest of the collection.

In our case, the following calculation takes place:

map (*3) [1,2,3]
[(3*1)] + map (*3) [2,3]
[(3*1)] + [(3*2)] + map (*3) [3]
[(3*1)] + [(3*2)] + [(3*3)]
[3] + [6] + [9]
[3,6,9]

Haskell takes pride in how easily it implements the quicksort algorithm. Let’s see how it’s done there:

quicksort :: (Ord a) => [a] -> [a]
quicksort [] = []
quicksort (x:xs) =
    let smallerSorted = quicksort [a | a <- xs, a <= x]
        biggerSorted = quicksort [a | a <- xs, a > x]
    in  smallerSorted ++ [x] ++ biggerSorted

I don’t blame you if this seems to be a bit more cryptic than you wanted to be. It takes a little practice to read what is really going on here. I'll explain it, as it will help our own Ruby implementation. The first line is the type declaration, ignore that for now. The second line is the guard, sorting an empty array will give you back an empty array. The meat of the logic begins on the third line. The collection argument is destructured into head and tail, just like I've been doing in the examples above. Based on the head value, we are filtering the elements into smaller-equal, and bigger parts. We do all this recursively until the list is exhausted. Right before the result is returned, the three items, the smaller sorted, the head value and the bigger sorted elements are combined into one collection.

Let’s see how this is done in Ruby. Here are the specs I prepared to prove the logic:

context 'quicksort' do
  it 'returns an empty list for empty list' do
    expect(Collections.quicksort([])).to eq([])
  end
  it 'sorts a list of items' do
    expect(Collections.quicksort([2,5,3])).to eq([2,3,5])
  end
end

Here is how I'd like the code to be:

def self.quicksort((head, *tail))
  return [] unless head

  smaller_sorted = quicksort(Collections.filter(->(x) { x <= head }, tail))
  bigger_sorted = quicksort(Collections.filter(->(x) { x > head }, tail))
  smaller_sorted + [head] + bigger_sorted
end

This logic is very close to the Haskell example, but unfortunately, I don't have the filter function just yet. (Ruby standard library offers the select method on enumerables, but let's keep these examples free from all that.) filter takes a lambda as its predicate function, and a collection it needs to operate on. This spec proves out our logic:

context 'filter' do
  specify 'filter (>2) [] returns an empty list' do
    expect(Collections.filter(->(x){ x > 2 }, [])).to be_empty
  end
  specify 'filter (>2) [1,3,5] returns [3,5]' do
    expect(Collections.filter(->(x){ x > 2 }, [1,3,5])).to eq([3,5])
  end
end

And the implementation is similar what you've seen before:

def self.filter(f, (head, *tail))
  return [] unless head

  if f.(head)
    [head] + filter(f, tail)
  else
    filter(f, tail)
  end
end

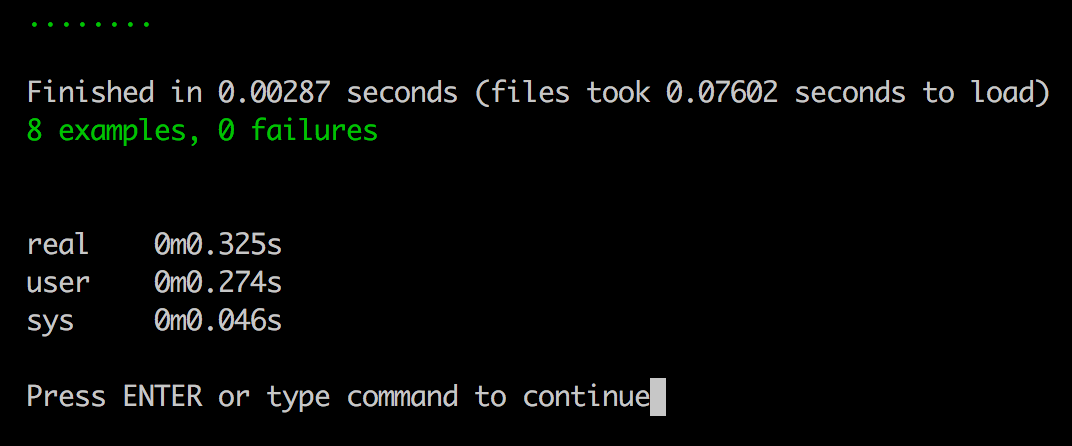
And now, when you run the entire spec, the quicksort implementation just magically works.

specs executed

Studying Haskell taught me a few things about recursion. The head and tail concept is essential to make the code simple and neat. Without that it would have been a lot more noisier. Whenever I used recursion before, I always felt I needed an accumulator. I wanted something I could jump to and investigate when something went wrong. I would have written the filter function like this before:

def self.filter(f, (head, *tail), accumulator=[])
  return accumulator unless head

  accumulator << head if f.(head)

  filter(f, tail, accumulator)
end

Although this works, adding the accumulator with a default argument to the list just makes this code a lot noisier, but I do like not having conditional branches in it, it's just easier to reason about this code.

You can review the examples in this gist.

Based on what you read here, try implementing replicate, take, reverse, repeat and zip functions yourself. In case you need directions, check out this gist to see how I did it.

Friday, October 21, 2016

Vim Katas

It was about 5 years ago when I watched Jim Weirich solving the Roman Numeral kata at an SCNA conference in Chicago. I was amazed by how he mastered his editor of choice: Emacs. His fingers were flying on the keyboard and he wrangled the code I have rarely seen anybody before that.

aws-lambda

I started using Vim in 2008 or 2009, but I never really invested the time to be good at it. I read the man pages, I went through Vim tutor, but I never really picked up or started using most of the advanced features.

I remember how great I felt when I reset my Caps Lock key to function as Ctrl key. The power of hitting <Ctrl+c> with my pinky and index finger just to trigger <Esc> without reaching up to the top left on the keyboard made me feel I've just found kryptonite.

I've had the book Practical Vim for some time, but I never really practiced the examples in it. I looked at them here and there, tried them out, but I've never made a habit of practicing those daily. Then one day I got sick and tired of my inabilities, I started a new markdown document where I jotted down the first exercise and the project of Vim Katas was born. Every time I commuted to work, I started with the first one and practiced all of them. Once I got to the end of it, I read the book further and added new exercises to it.

I might have covered 60% of the book by now, but when I bump into a repeatable task and I leverage a macro for it, it always puts a smile on my face.

Using Vim reminds me of learning to play a musical instrument. It takes time and effort to be good at it, and the keystrokes have to be at your fingertips. Once you slow down and think about it, the effectiveness of the text-based editor fades away, you would be more efficient by using visual editor instead (like Sublime Text, IntelliJ or Visual Studio).

Vim (and I am sure many other tools) has this huge wall that people have to climb first to appreciate it. Clone that repo, open the first markdown file in Vim, and start practicing!

Monday, June 6, 2016

Using Ruby with ActiveRecord in AWS Lambda

In my previous blog post I described how you can run MRI Ruby on AWS Lambda. In this article I'll guide you through adding gems to the project: first faker, and then the mysql2 gem with activerecord, and finally we will have the Ruby code talk to an RDS instance, all this through an AWS Lambda.

I recorded all my changes in this project, feel free to jump in where you want, you'll find commit points after each section.

1. Add faker to the project

You can pick up the changes from the previous blog post here. Let's start by editing our Ruby app, add a Gemfile to it in the hello_ruby directory:

source 'https://rubygems.org'

gem 'faker'

Run BUNDLE_IGNORE_CONFIG=1 bundle install --path vendor in that directory. The --path vendor argument is important, as we have to package all the files in the vendor directory. Make sure the BUNDLED WITH part of your Gemfile.lock is not there as that can cause you some pain when you deploy your code to AWS Lambda.

Edit the lib/hello.rb file like this:

#!/usr/bin/env ruby

require 'faker'

puts "Hello - '#{Faker::Name.name}' from Ruby!"

We required the faker gem and used it to generate a fake name. Run the app in the terminal with bundle exec ruby lib/hello.rb command.

Hello - 'Jamar Gutmann II' from Ruby!

You will get a different name between the single quotes, but that's the point, faker generates a random name for us.

Commit point

2. Use faker with Traveling Ruby

The run target in the Makefile will have to copy all vendorized gems, plus it needs to configure the app to run with the correct bundler settings. This step is heavily influenced by how Traveling Ruby packages gems for deployment, please review their tutorial as reference.

Add a bundler_config template file to the resources directory with this content:

BUNDLE_PATH: .
BUNDLE_WITHOUT: development:test
BUNDLE_DISABLE_SHARED_GEMS: '1'

Change the resources/wrapper.sh file to set the Gemfile’s location:

#!/bin/bash
set -e

# Figure out where this script is located.
SELFDIR="`dirname \"$0\"`"
SELFDIR="`cd \"$SELFDIR\" && pwd`"

# Tell Bundler where the Gemfile and gems are.
export BUNDLE_GEMFILE="$SELFDIR/lib/vendor/Gemfile"
unset BUNDLE_IGNORE_CONFIG

# Run the actual app using the bundled Ruby interpreter, with Bundler activated.
exec "$SELFDIR/lib/ruby/bin/ruby" -rbundler/setup "$SELFDIR/lib/app/hello.rb"

Modify the Makefile's run target with the following changes:

...

run: ## Runs the code locally
    @echo 'Run the app locally'
    @echo '-------------------'
    @rm -fr $(OSXDIR)
    @mkdir -p $(OSXDIR)/lib/ruby
    @tar -xzf resources/traveling-ruby-20150715-2.2.2-osx.tar.gz -C $(OSXDIR)/lib/ruby
    @mkdir $(OSXDIR)/lib/app
    @cp hello_ruby/lib/hello.rb $(OSXDIR)/lib/app/hello.rb
    @cp -pR hello_ruby/vendor $(OSXDIR)/lib/
    @rm -f $(OSXDIR)/lib/vendor/*/*/cache/*
    @mkdir -p $(OSXDIR)/lib/vendor/.bundle
    @cp resources/bundler-config $(OSXDIR)/lib/vendor/.bundle/config
    @cp hello_ruby/Gemfile $(OSXDIR)/lib/vendor/
    @cp hello_ruby/Gemfile.lock $(OSXDIR)/lib/vendor/
    @cp resources/wrapper.sh $(OSXDIR)/hello
    @chmod +x $(OSXDIR)/hello
    @cd $(OSXDIR) && ./hello

...

Run the target with make run and you should see something similar to this in the terminal:

$: make run
Run the app locally
-------------------
Hello - 'Kelly Huel' from Ruby!

We've just run the app with Traveling Ruby's Ruby interpreter, and we used the faker gem's functionality as well!

Commit point

3. Deploy the app with faker to AWS Lambda

In order to run your app in AWS Lambda, you only need to change the package target in your Makefile, everything else, the delete, create, invoke targets should remain the same. Change the file like this:

...

package: ## Package the code for AWS Lambda
    @echo 'Package the app for deploy'
    @echo '--------------------------'
    @rm -fr $(LAMBDADIR)
    @rm -fr deploy
    @mkdir -p $(LAMBDADIR)/lib/ruby
    @tar -xzf resources/traveling-ruby-20150715-2.2.2-linux-x86_64.tar.gz -C $(LAMBDADIR)/lib/ruby
    @mkdir $(LAMBDADIR)/lib/app
    @cp hello_ruby/lib/hello.rb $(LAMBDADIR)/lib/app/hello.rb
    @cp -pR hello_ruby/vendor $(LAMBDADIR)/lib/
    @rm -f $(LAMBDADIR)/lib/vendor/*/*/cache/*
    @mkdir -p $(LAMBDADIR)/lib/vendor/.bundle
    @cp resources/bundler-config $(LAMBDADIR)/lib/vendor/.bundle/config
    @cp hello_ruby/Gemfile $(LAMBDADIR)/lib/vendor/
    @cp hello_ruby/Gemfile.lock $(LAMBDADIR)/lib/vendor/
    @cp resources/wrapper.sh $(LAMBDADIR)/hello
    @chmod +x $(LAMBDADIR)/hello
    @cp resources/index.js $(LAMBDADIR)/
    @cd $(LAMBDADIR) && zip -r hello_ruby.zip hello index.js lib/
    @mkdir deploy
    cd $(LAMBDADIR) && mv hello_ruby.zip ../deploy/
    @echo '... Done.

...

The added rows are very similar to the ones we had to add to run the app locally with Traveling Ruby. Delete the lambda function and recreate it by using the Makefile. When you invoke it, your should see something like this:

START RequestId: 3f6ae8f5-23c1-11e6-9acc-0f50ffa39e9b Version: $LATEST
2016-05-27T04:12:41.473Z
  3f6ae8f5-23c1-11e6-9acc-0f50ffa39e9b
    Hello - 'Mrs. Lelah Bradtke' from Ruby!

END RequestId: 3f6ae8f5-23c1-11e6-9acc-0f50ffa39e9b
REPORT RequestId: 3f6ae8f5-23c1-11e6-9acc-0f50ffa39e9b
       Duration: 3425.01 ms
       Billed Duration: 3500 ms
       Memory Size: 512 MB
       Max Memory Used: 65 MB

The Hello - 'xyz' from Ruby! string contains the Faker gem generated name. You can also invoke the Lambda function through the AWS Management Console, you should see something similar to this in the Log output section:

faker-with-aws-lambda

Commit point

4. Publish a newer version to AWS Lambda

Dropping and recreating the Lambda function works, but it's not the most effective solution. AWS allows you to update your function which we'll do with this new target in the Makefile:

...

publish: package ## Deploys the latest version to AWS
        aws lambda update-function-code \
                --function-name HelloFromRuby \
                --zip-file fileb://./deploy/hello_ruby.zip

...

This target will let you update the function code. It also calls the package target to make sure your latest changes will be deployed to AWS.

Commit point

5. Create a new RDS database with one table

Add this script to your Makefile, it will create a minimal RDS instance for you, you can drop that instance, connect to the DB and drop/create the database with some seed data in it.

DBPASSWD=Kew2401Sd
DBNAME=awslambdaruby

...

create-rds-instance: ## Creates an RDS MySQL DB instance
    aws rds create-db-instance \
        --db-instance-identifier MyInstance01 \
        --db-instance-class db.t1.micro \
        --engine mysql \
        --allocated-storage 10 \
        --master-username master \
        --master-user-password $(DBPASSWD)

delete-rds-instance: ## Deletes an RDS MySQL DB instance
    aws rds delete-db-instance \
        --db-instance-identifier MyInstance01 \
        --skip-final-snapshot

db-connect: ## Connects to the RDS instance
    mysql --user=master --password=$(DBPASSWD) --host myinstance01.cgic5q3lz0bb.us-east-1.rds.amazonaws.com

create-db: ## Creates a DB with a table and records
    @echo "Dropping  and creating database"
    @echo "-------------------------------"
    @mysql -u master --password='$(DBPASSWD)' --host myinstance01.cgic5q3lz0bb.us-east-1.rds.amazonaws.com -e "DROP DATABASE IF EXISTS $(DBNAME)" > /dev/null 2>&1
    @mysql -u master --password='$(DBPASSWD)' --host myinstance01.cgic5q3lz0bb.us-east-1.rds.amazonaws.com -e "CREATE DATABASE $(DBNAME)" > /dev/null 2>&1
    @mysql -u master --password='$(DBPASSWD)' --host myinstance01.cgic5q3lz0bb.us-east-1.rds.amazonaws.com $(DBNAME) < resources/schema.sql > /dev/null 2>&1
    @mysql -u master --password='$(DBPASSWD)' --host myinstance01.cgic5q3lz0bb.us-east-1.rds.amazonaws.com $(DBNAME) < resources/seed.sql > /dev/null 2>&1
    @echo "... Done"

...

Create the RDS instance first, AWS will need some time to initialize it. Allow incoming connections to it by adjusting the "Inbound" traffic through your own IP under your Security Group:

adjust-security-group

You can connect to the RDS instance through the mysql console using the db-connect target. You'll need to adjust the hostname to yours. Once that works out, use the create-db target to create a DB with a table and add two records to it. If all goes well, this is what you should see when you query the users table in the MySQL console:

mysql> SELECT * FROM users;
+----+--------+------------------+-----------+----------+
| id | login  | email            | firstname | lastname |
+----+--------+------------------+-----------+----------+
|  1 | jsmith | jsmith@gmail.com | John      | Smith    |
|  2 | bjones | bjones@gmail.com | Bob       | Jones    |
+----+--------+------------------+-----------+----------+
2 rows in set (0.04 sec)

Commit point

6. Connect to MySQL with Rails' ActiveRecord

Add the mysql2 and active_record gems to the Ruby app's Gemfile:

gem 'activerecord'
gem 'mysql2', '0.3.18'

We need to use the 0.3.18 version of the mysql2 gem, as that comes packaged with Traveling Ruby. Run bundle install to get the new gems via Bundler.

Modify the lib/hello.rb file to have this:

#!/usr/bin/env ruby

require 'faker'
require 'active_record'

ActiveRecord::Base.establish_connection(
  :adapter  => "mysql2",
  :host     => "myinstance01.cgic5q3lz0bb.us-east-1.rds.amazonaws.com", # use your instance name
  :username => "master",
  :password => "Kew2401Sd",
  :database => "awslambdaruby"
)

class User < ActiveRecord::Base
end

puts "Number of users: #{User.count}"
puts "First user: #{User.first.firstname} #{User.first.lastname}"
puts "Hello - '#{Faker::Name.name}' from Ruby!"

You need to adjust the :host value to your RDS instance host name as mine won't work for you. You'll know that everything is set up properly when you see this in the terminal:

$: bundle exec ruby lib/hello.rb
Number of users: 2
First user: John Smith
Hello - 'Miss Darrick Powlowski' from Ruby!

Commit point

7. Use Traveling Ruby’s packaged mysql gem

You need to download the Traveling Ruby packaged mysql2 gem from their S3 bucket. Let’s put it into our resources directory.

Modify the package target like this:

...

package: ## Packages the code for AWS Lambda
    @echo 'Package the app for deploy'
    @echo '--------------------------'
    @rm -fr $(LAMBDADIR)
    @rm -fr deploy
    @mkdir -p $(LAMBDADIR)/lib/ruby
    @tar -xzf resources/traveling-ruby-20150715-2.2.2-linux-x86_64.tar.gz -C $(LAMBDADIR)/lib/ruby
    @mkdir $(LAMBDADIR)/lib/app
    @cp hello_ruby/lib/hello.rb $(LAMBDADIR)/lib/app/hello.rb
    @cp -pR hello_ruby/vendor $(LAMBDADIR)/lib/
    @rm -fr $(LAMBDADIR)/lib/vendor/ruby/2.2.0/extensions
    @tar -xzf resources/mysql2-0.3.18-linux.tar.gz -C $(LAMBDADIR)/lib/vendor/ruby/
    @rm -f $(LAMBDADIR)/lib/vendor/*/*/cache/*
    @mkdir -p $(LAMBDADIR)/lib/vendor/.bundle
    @cp resources/bundler-config $(LAMBDADIR)/lib/vendor/.bundle/config
    @cp hello_ruby/Gemfile $(LAMBDADIR)/lib/vendor/
    @cp hello_ruby/Gemfile.lock $(LAMBDADIR)/lib/vendor/
    @cp resources/wrapper.sh $(LAMBDADIR)/hello
    @chmod +x $(LAMBDADIR)/hello
    @cp resources/index.js $(LAMBDADIR)/
    @cd $(LAMBDADIR) && zip -r hello_ruby.zip hello index.js lib/ > /dev/null
    @mkdir deploy
    @cd $(LAMBDADIR) && mv hello_ruby.zip ../deploy/
    @echo '... Done.'

...

We need to replace the content of the 2.0.0/extensions directory with the Traveling Ruby's Linux version, as the one copied there is OSX specific.

AWS Lambda has an IP address other than your IP. In order to make it easy for you now, (and don't do this anywhere else), I'd suggest making your AWS Instance available without IP restriction. Do this only temporarily, to test things out, remove this Inbound rule once you've seen your Lamba working. You can specify the VPC your Lambda has access to, but the topic of AWS Lambda security would need another blog post just in itself.

This is how I opened up my RDS instance for any IP out there:

connect-anywhere

If everything is configured properly, you should see something like this in your terminal when you call the Lambda function with the make invoke command:

% make invoke
rm -fr tmp && mkdir tmp
aws lambda invoke \
        --invocation-type RequestResponse \
        --function-name HelloFromRuby \
        --log-type Tail \
        --region us-east-1 \
        --payload '{"name":"John Adam Smith"}' \
        tmp/outfile.txt \
        | jq -r '.LogResult' | base64 -D
START RequestId: 8444ede9-26d8-11e6-954c-fbf57aab89fb Version: $LATEST
2016-05-31T02:36:50.587Z        8444ede9-26d8-11e6-954c-fbf57aab89fb
Number of users: 2
First user: John Smith
Hello - 'Jeanne Hansen' from Ruby!

END RequestId: 8444ede9-26d8-11e6-954c-fbf57aab89fb
REPORT RequestId: 8444ede9-26d8-11e6-954c-fbf57aab89fb
Duration: 5072.62 ms
Billed Duration: 5100 ms
Memory Size: 512 MB
Max Memory Used: 53 MB

Sweet! The Ruby code in this AWS Lambda function reports back 2 users and correctly displays the first record.

Commit point

Being able to use MRI Ruby with gems opens up a ton possibilities for us (and I hope for you as well). AWS Lambdas are neat little workers that can scale up and down very well. It's much easier to launch a 1000 AWS Lambdas at the same time than running Ruby processes with resque or sidekiq on worker boxes.

Friday, June 3, 2016

Using Ruby in AWS Lambda

It was May 2015 at the AWS Summit in Chicago, where I first heard about AWS Lambda. The company I worked for used Linode at that time, I had no chance of using it, but I still found the serverless concept fascinating.

aws-lambda

The bulk of my work at my current gig is about transforming data: we pull it from an API, we need to transform and load it into our own data store. Sure the worker boxes can do the job, but maintaining a series of these instances takes effort. AWS Lambda would be the perfect solution for us, but Amazon does not support Ruby natively, which is most of our business logic is written in.

AWS, as of this writing, offers Lambda for three main platforms: Java, Node.JS, and Python. I played around running Clojure on it, which worked as the code is compiled into a jar file, but our current app - due to its monolithic nature - can’t support any other languages just yet.

Amazon claims you can run your language of choice on AWS Lambda, Ruby included, but I have not found a comprehensive guide that would describe how. Once you can package up your app to run as an executable, you can run it. I found this blog post that describes how Swift code can be bundled, deployed and invoked on AWS Lambda. It was clear to me that this solution would work, I only had to package Ruby with its own interpreter to accomplish the same. I looked for tools that can do this and found Traveling Ruby. You can package your code and run it as an executable on the user’s computer, no local Ruby installation is needed. I wanted to try it locally first, thinking if it works there (on OSX), it should work on AWS Lambda as well.

This blog post is a step-by-step tutorial to run MRI Ruby on AWS Lambda. You can follow along with the accompanying project, I listed commit points at the end of each section.

This tutorial assumes you are familiar with AWS, you have access to the AWS Management Console and you have the AWS Command Line Interface configured to interact with your services via the terminal.
You'll need the same version of Ruby as the one Traveling Ruby offers. The latest there is Ruby 2.2.2, I'd recommend installing that through Rbenv or RVM.

1. Setting up the project

I named the project aws-lambda-ruby and created a directory structure like this:

- aws-lambda-ruby
    |- hello_ruby
         |- lib
             |- hello.rb

I put this code in the hello.rb file:

puts 'Hello from Ruby!'

I made sure my Ruby version in the project is 2.2.2 by setting it with Rbenv.

$: cd hello_ruby && ruby lib/hello.rb
Hello from Ruby!

Commit point

2. Execute the Ruby Code with Traveling Ruby

Create a directory under the project root directory with the name resources. Your directory structure should look like this:

- aws-lambda-ruby
    |- hello_ruby
    |- resources

Download the Ruby runtimes from Traveling Ruby's S3 bucket into the resources directory. I only needed the OSX version for local development and the Linux x86_64 version for AWS. My directory had these two files in it:

- aws-lambda-ruby
    |- hello_ruby
    |- resources
         |- traveling-ruby-20150715-2.2.2-linux-x86_64.tar.gz
         |- traveling-ruby-20150715-2.2.2-osx.tar.gz

Commit point

Create two new directories for assembling the project under OSX and Linux X86_64 like these:

- aws-lambda-ruby
    |- hello-2.0.0-linux-x86_64
    |- hello-1.0.0-osx
    |- hello_ruby
    |- resources

Add a Makefile to the project under the root directory, we want to automate all the different steps as early as possible. Create a Make target to package and run the code on OSX like this:

run: ## Runs the code locally
    @echo 'Run the app locally'
    @echo '-------------------'
    @rm -fr $(OSXDIR)
    @mkdir -p $(OSXDIR)/lib/ruby
    @tar -xzf resources/traveling-ruby-20150715-2.2.2-osx.tar.gz -C $(OSXDIR)/lib/ruby
    @mkdir $(OSXDIR)/lib/app
    @cp hello_ruby/lib/hello.rb $(OSXDIR)/lib/app/hello.rb
    @cp resources/wrapper.sh $(OSXDIR)/hello
    @chmod +x $(OSXDIR)/hello
    @cd $(OSXDIR) && ./hello

Traveling Ruby suggests running the app through an executable shell script, that's what the resources/wrapper.sh file is:

#!/bin/bash
set -e

# Figure out where this script is located.
SELFDIR="`dirname \"$0\"`"
SELFDIR="`cd \"$SELFDIR\" && pwd`"

# Run the actual app using the bundled Ruby interpreter.
exec "$SELFDIR/lib/ruby/bin/ruby" "$SELFDIR/lib/app/hello.rb"

If you have all the right files in the correct directories and your Makefile has the run target with the code above when you execute make run, this is what you should see in your terminal:

$: make run
Run the app locally
-------------------
Hello from Ruby!

We ran the Ruby code with the Traveling Ruby packaged Ruby runtime, not with the locally installed Ruby, that was set up with a Ruby version manager.

Commit point

3. Package the Code for AWS Lambda

We need to package the code for AWS Lambda after running the app locally on OSX. You can easily check the Lambda runtime by running an AWS Lambda function with Python. Create a new AWS Lambda with the "hello-world-python" template with this Python code in it:

from __future__ import print_function

import json
import commands

print('Loading function')

def lambda_handler(event, context):
    print(commands.getstatusoutput('cat /etc/issue'))
    print(commands.getstatusoutput('uname -a'))
    print(commands.getstatusoutput('pwd'))

There are plenty of tutorials out there to guide you through creating an AWS Lambda, please Google the solution if you don’t know what to do. When you run it, this is the information you should get:

python-system-info

We will use Node.js to execute the code, place this JavaScript file in your resources directory with the name index.js:

process.env['PATH'] = process.env['PATH'] + ':' + process.env['LAMBDA_TASK_ROOT']

var exec = require('child_process').exec;
exports.handler = function(event, context) {
  var command = `./hello`;
  child = exec(command, {env: {'LD_LIBRARY_PATH': __dirname + '/lib'}}, function(error) {
    // Resolve with result of process
    context.done(error, 'Process complete!');
  });
  // Log process stdout and stderr
  child.stdout.on('data', console.log);
  child.stderr.on('data', console.error);
};

The index.handler will be invoked by Lambda, which will spawn a new child process by executing the hello shell script, which will run the Ruby code with Traveling Ruby.

The package Make target will assemble the directory for AWS Lambda and compress it into a zip file. This is how that code looks:

LAMBDADIR=hello-1.0.0-linux-x86_64

...

package: ## Package the code for AWS Lambda
    @echo 'Package the app for deploy'
    @echo '--------------------------'
    @rm -fr $(LAMBDADIR)
    @rm -fr deploy
    @mkdir -p $(LAMBDADIR)/lib/ruby
    @tar -xzf resources/traveling-ruby-20150715-2.2.2-linux-x86_64.tar.gz -C $(LAMBDADIR)/lib/ruby
    @mkdir $(LAMBDADIR)/lib/app
    @cp hello_ruby/lib/hello.rb $(LAMBDADIR)/lib/app/hello.rb
    @cp resources/wrapper.sh $(LAMBDADIR)/hello
    @chmod +x $(LAMBDADIR)/hello
    @cp resources/index.js $(LAMBDADIR)/
    @cd $(LAMBDADIR) && zip -r hello_ruby.zip hello index.js lib/
    @mkdir deploy
    @cd $(LAMBDADIR) && mv hello_ruby.zip ../deploy/
    @echo '... Done.'

...

I only list the content that I added, the run target is still in the Makefile but I omitted it here for brevity. When you execute make package, you should see the following output:

$: make package
Package the app for deploy
--------------------------
... Done.

and a hello_ruby.zip file should be created in your deploy directory.

Commit point

4. Deploy the Packaged Ruby Code to AWS Lambda

We created a hello_ruby.zip file in the previous section, let's deploy this zip file to AWS Lambda. Open the AWS Management Console and select "Lambda" from the options. Your created Lambdas (if you had any) are listed here. Let’s start creating a new one by clicking on the "Create a Lambda function" button. Select the "node-exec" template:

node-exec

Fill out the form as you see it in this screenshot:

create_function

  1. Name it "HelloFromRuby"
  2. Chose the option of "Upload a .ZIP file"
  3. Use the lambda_basic_execution role, if you don’t have it, create it

Confirm it and create the Lambda function.

Test the function by clicking on the blue "Test" button. You can accept the HelloWorld test template, those arguments are going to be ignored for now. You should see the following output:

log_output

The string "Hello from Ruby!" is coming from the Ruby code executed by Traveling Ruby, just like we did locally.

Woohoo! Congrats, you’ve just created an AWS Lambda function with MRI Ruby.

5. Use the AWS Command Line Interface to Publish an AWS Lambda Function

Although creating a Lambda through the GUI works, it's not something I'd do in the long run. The steps of dropping and creating Lambdas can be automated through the AWS Command Line Interface, those scripts can be easily executed from a Make target. Let's add a new target to drop the already existing Lambda function:

(This blog post assumes you already know how to use the AWS Command Line Interface, you have it configured properly. There is good documentation around this, please look it up and set it up for yourself.)

...

delete: ## Removes the Lambda
    aws lambda delete-function --function-name HelloFromRuby

...

Your 'HelloFromRuby' Lambda function will be deleted when you run make delete in your terminal. Go back to the AWS Management Console to verify that your Lambda function got deleted.

Add your lambda with the following script in your Make file:

...

create: ## Creates an AWS lambda function
    aws lambda create-function \
        --function-name HelloFromRuby \
        --handler index.handler \
        --runtime nodejs4.3 \
        --memory 512 \
        --timeout 10 \
        --description "Saying hello from MRI Ruby" \
        --role arn:aws:iam::___xyz___:role/lambda_basic_execution \
        --zip-file fileb://./deploy/hello_ruby.zip

...

I masked the role argument, you need to find your correct "Role ARN" value under Security -> IAM -> Roles. You should look for it here:

role-arn

If everything is configured properly, you should be able to create your AWS Lambda function by running make create in the terminal.

We can invoke the lambda from the command line as well, this Make target will do just that:

...

invoke: ## Invoke the AWS Lambda in the command line
    rm -fr tmp && mkdir tmp
    aws lambda invoke \
    --invocation-type RequestResponse \
    --function-name HelloFromRuby \
    --log-type Tail \
    --region us-east-1 \
    --payload '{"name":"John Adam Smith"}' \
    tmp/outfile.txt \
    | jq -r '.LogResult' | base64 -D

...

Please note, that I am using a lightweight JSON parser, jq to extract information from the response. You should see the following response from AWS Lambda:

START RequestId: e8c24c91-2165-11e6-a0b6-35430628271f Version: $LATEST
2016-05-24T04:13:46.403Z        e8c24c91-2165-11e6-a0b6-35430628271f

Hello from Ruby!

END RequestId: e8c24c91-2165-11e6-a0b6-35430628271f
REPORT RequestId: e8c24c91-2165-11e6-a0b6-35430628271f
       Duration: 214.12 ms
       Billed Duration: 300 ms
       Memory Size: 512 MB
       Max Memory Used: 20 MB

Commit point

This blog post guided you through the steps of running MRI Ruby on AWS lambda. In the upcoming post, I'll show you how you can add gems and talk with an RDS instance from your Ruby code on AWS Lambda.

Sunday, May 15, 2016

Currying in Haskell, Clojure, Ruby and JavaScript

I worked with a developer about a year ago, who had more experience with functional programming than I had. We worked on a Clojure project, and his deep Haskell background made him an expert on our team. This was especially revealing when we discussed partial function applications and currying. I was vaguely familiar with the concept, but I've never used them in any of the apps I've worked on.

Fast forward a year, after learning and playing with Haskell for a few months, I understand why: in Haskell, everything is curried. I repeat: everything. Even the function invocation is curried. In fact, you have to work hard if you want it differently. No wonder, currying was so obvious for that developer.

haskell-logo

Let's look at a simple example in Haskell:

-- You can type this in your own GHCi or try it in https://ghc.io/
let multiply x y = x * y
let double = multiply 2
let triple = multiply 3

double 3
triple 4

I created a multiply function that takes two arguments and multiplies them. In Haskell everything is curried, it's perfectly fine to invoke this function with only a single argument. What will I get back? Another function. This was the breakthrough for me: partially applying a function yields another function. Then I defined two other functions, one that passes in 2 to double, the other 3 to triple whatever argument I pass to it.

What I was amazed by this was the easiness and the natural nature of Haskell's currying through partial application.

Let's see how this simple example would look in Clojure.

(defn multiply [x y] (* x y))
(def double (partial multiply 2))
(def triple (partial multiply 3))

(double 3) ;; will yield 6
(triple 4) ;; will produce 12

This works, but yuck, I had to use a special language construct partial to signal, that I'll be partially applying the multiply function. Based on the Haskell example, my intuition was to use defn for the double and triple functions, but that tripped me over, it did not work. I had to "StackOverflow" it to realize, that the def binding is needed instead of defn to produce the partially applied function. This is a far cry from Haskell, where everything felt natural.

Although Ruby is a dynamically typed object-oriented language, it has many functional constructs that I enjoy using. I was curious if Ruby supports currying. To my surprise, it does. Look at the same example with partial functions and currying in Ruby.

multiply = -> (x, y) { x * y }
double = multiply.curry.(2)
triple = multiply.curry.(3)

double.(3) # will yield 6
triple.(4) # will produce 12
Well, this works, but it's far from Haskell's obvious nature, where I did not have to use any kind of special keywords to achieve the same result.

Here is how I would write this with "programming by wishful thinking":

# This won't work
multiply = -> (x, y) { x * y }
double = multiply(2)
triple = multiply(3)

I am sure the Ruby language authors had a reason to use curry for partial applications, but it just did not feel natural. I have to learn and remember how to use it properly.

There are currying related npm packages in Node.js, but I have not found anything that's built into the language. Here is how the poor man's currying is done in JavaScript:

var multiply = function(x) {
  return function(y) {
    return x * y;
  }
}

var double = multiply(2);
var triple = multiply(3);

double(3); // will yield 6
triple(4); // will produce 12
I like JavaScript's "functions are first class citizens" nature, I am sure once ES6 or 7 gets widely adopted, it will be a language I'll enjoy using in the future.

Learning about currying in one language and using those concepts in another is an obvious benefit of learning a programming language in every year.

Sunday, March 27, 2016

Why Make?

A new member joined our team a couple of weeks ago, and as we took him out for a cup of coffee on his first week, he asked me a question: "I’ve never seen this before and I wanted to ask you. Why are you using Make in your Ruby project?"

His question was legit coming from someone in the Ruby world, where we have rake for achieving the same goal. I had to think about the history there as I explained my reasoning behind using it.

As I started looking at other programming languages, rake wasn’t available for me. A couple of years ago I got pretty deep into node.js, and there were repetitive tasks I had to do, like dropping and rebuilding a database, running the tests, etc. I created a script directory and put separate scripts in it to accomplish all that.

For example, for the two tasks I mentioned above, I created two scripts:

project_root
   |- scripts
        |- build_db.sh
        |- run_tests.sh

This worked OK for a while, but when I contributed to the great testing framework mocha.js, I realized that the author of that module, T.J., just took these convenience scripts to another level by using Make.

I noticed he is using Make to run simple shell commands in a more elegant manner than I did with my scripts directory and shell scripts in it. I immediately started to adopt this practice.

As I started exploring other languages like Clojure, Erlang, Haskell, using Make was an obvious choice. It did not matter what language I used, dropping and building a database was the same task, regardless.

This practice came with me as I went back to Ruby as well. As I started working on larger, 3-4-year-old Rails apps, running rake tasks was a time-consuming exercise. Bundler had to load the whole world into memory before it could even evaluate what it had to do. This way, simple tasks that had nothing to do with Rails had an 8-10 seconds startup time. I did not think twice about firing up a Makefile to do the same in less than a second.

Of course, some of the religious Rails disciples dismissed this, but productivity over religion has a higher precedence for me.

A few weeks ago I found a blog post on how to add task description to Make targets. I updated my Makefiles, and now, when I run make in the terminal, this is what I see:

As I have not found a good make target generator, I created a gist to get me rolling. Documentation and a sample target are a good way to get started. I even added a shell function to grab it for me:

make-init() {
  curl https://gist.githubusercontent.com/adomokos/2fd95840d59b19bbb3f4/raw/7b548cd3fda0dab958ecb0e0955fbadc1af6ef6e/Makefile > Makefile
}

Now, I only need to type make-init in the terminal and I have a Makefile to work with.

Friday, February 19, 2016

Teaching Clojure to a 7-Year-Old

I see my 7-year-old son as someone, who is deeply interested in anything computer related. I recall how he went through photos on my iPod Touch when he was only two years old. Then video games kicked in, and now he can make an 8-hour flight back to Europe without taking a break from a game on an iPad.

This is all nice and cool, but why don't we do something more useful with this passion?! He has been curious about programming, he practiced basic function calls via the game Code Combat. I figured, let's take this to the next level and try programming.

I wanted to use a language that is easy to understand, but can be very powerful. I considered Python or JavaScript, but I figured his first real programming language should be a functional one, and the simple nature of LiSP made Clojure the obvious choice.

I wanted to find an editor that's easy to use. I was aware of LightTable, but I've never tried it. We downloaded it on my wife's 11" MacBook Air and we jumped in.

What's really cool about LightTable is that you don't need to run a separate REPL, you could just write your Clojure expressions in a clj file, save it and by hitting <Cmd> + <Shift> + <Enter> the expressions are evaluated in line, right next to them. It's really the best tool for beginners.

We worked on a rectangular area calculator in our first session, since that's what he's been learning at school. This was our first expression:

(defn area [x y] (* x y))

(area 2 3) # 6
We tried different numbers, he was pumped when the correct number was printed in LightTable after the evaluation.

Our area function is for rectangles, but what if we wanted to calculate the square's area? We only had to pass one number to our calculator.
Of course we could have done this:

(area 4 4) # 16
But this was not very elegant. I proposed creating a new function for square-area and calling area from that this way:
(defn square-area [x]
  (area x x))

(square-area [4]) # 16
My goal here was to show him how one function can leverage the functionality of another function. He liked this a lot.

In our next session - as he constantly nudged me to continue his journey in Clojure programming land - I wanted to teach him something we could build upon: we learned about vectors, which is similar to Arrays in other programming languages.

We started out with listing his best friends:

(def friends [:andy :james :tommy :ethan :elliot])
I explained to him that these names are in order and they will always remain in order the way he defined it first. There are ways to explore the collection, for example pulling the first item from it. This is what we tried:
(first friends) # :andy
I asked him if he could get the last item of the vector. He thought about a bit and this is what he came up with:
(last friends) # :elliot
Excellent! Then I asked him how we could get the third item from the collection and he intuitively tried the function third, which does not exist. I showed him the nth function to do that. This is what he tried to get the third item:
(nth friends 3) # :ethan
But oh, it returned the fourth and not the third item. So we talked about the 0-based index, which he grasped, but did not make much sense to him.

I told him: "Imagine how great it would be to sort these names in alphabetical order. Do you know what verb would describe that operation?" He said "sort", so we gave it a try:

(sort friends) # (:andy :elliot :ethan :james :tommy)
We both smiled at how easy it was. Then I asked him if we could put the names in descending order. We were looking for the right word, and he came up with backwards. Well, it's close, so I asked him to look up synonyms for that word in Google. We both settled on reverse. He tried this:
(reverse friends) # (:elliot :ethan :tommy :james :andy)
Oh-oh. This only put the original list into reverse order without sorting. It was obvious that we needed to sort it first and then reverse it. I helped him to write this:
(reverse (sort friends)) # (:tommny :james :ethan :elliot :andy)

We wrapped up our session by creating a vector with numbers.

(def numbers [9 12 5 7 1])
Based on what he learned earlier, he put them numbers in descending order:
(reverse (sort numbers)) # (12 9 7 5 1)
I showed him how we could use the filter and the odd? functions to filter out the odd numbers.
(filter odd? numbers) # (9 5 7 1)
He was able to sort the odd numbers by using the sort function:
(sort (filter odd? numbers)) # (1 5 7 9)
Picking the largest odd number was a tricky one, we had to look at the docs, as this did not work:
(max (filter odd? numbers)) # (1 5 7 9)
But this did:
(apply max (filter odd? numbers)) # 9
There was an easier way to get the largest odd number: reverse sorting the odd numbers and getting the first item. This is what we wrote:
(first (reverse (sort (filter odd? numbers)))) # 9
We both smiled when we saw the result.

This is the full code we wrote together:

We are going to spend half of our time going through the same function composition the next time. Then we might look at other collection types like maps and sets. I don't want to push him, but if he asks for it, we'll go as far as we can.

Tuesday, January 26, 2016

Vitamin, Medicine, Drug

I worked with a good friend of mine on a product idea a few months ago. The number of disengaged employees at large enterprises is staggering, we both have witnessed this during our professional career. We tried measuring employee engagement and happiness by frequent, short surveys, providing a real-time engagement thermometer to management.

I talked with two investors about our idea and one of them told me this: "There are two types of products, vitamins and medicines. While vitamins are good to have for a company, it's not absolutely essential. The company can survive and even thrive without it. However, a medicine is a must have, companies can't live without it. I tend to invest in medicine-like product ideas, and I am sorry, yours is a vitamin. It can get big, but selling the idea will be hard."

The Vitamin

A vitamin product might be important for management, but the perceived value for the employee is unclear. Unless we were able to provide some kind of value for the person who fills out our survey, the employee would never be engaged.

I once had to track my hours on projects at a large enterprise just to provide data for the army of project managers to calculate actual project cost. Although this had value to the employer, it had very little value to me or my peers. We were constantly nudged by management to log the hours by the end of each week.
Now, if the company is in consulting and the employee won't get paid unless she provides the hourly breakdown of billable hours, it's a different story. The employee has vested interest in providing the data, otherwise, she will never get paid.

Selling the Vitamin can take an army of sales people for cold calling prospects. The referral rate is low, users are not very engaged.

The Medicine

The medicine product has real benefits for both the employee and the employer.
I have witnessed SalesForce shifting from vitamin to medicine category before. Initially, it wasn't taken seriously by the sales teams, but as soon as it was leveraged for financial reporting, it became essential for the company.
Basecamp is another good example for medicine, which is adopted by the enterprise (mostly) through employee demand. I've read about people using Basecamp for their freelance projects, and when they join larger companies, they suggest this tool.
Github is so good, it's pushing the boundaries of medicine. I have worked with many software engineers, however, I have never met a single sales person from Github trying to talk us into submitting our credit card and signing up for private repositories.

Medicine is easy to sell, users are recommending it to other potential customers. Companies with a medicine-like software have a smaller sales team. The reputation of the product is selling itself.

The Drug

There is a third category this investor did not mention to me, but it exists out there. People are so hooked, they get angry when they don't have access to it. It's Facebook. The company did an exercise just recently to train for the battle against Google, they made Facebook inaccessible for Android users to investigate what they would do. Users tried to restart the app on their mobile device a couple of times. When that did not work, they opened their browsers and logged on through that. No matter what, they did not want to miss anything that was happening with their friends.

Finding the drug is super hard. But medicine-like products can be invented, and vitamins can transition into medicine.

When you're searching for a new gig, or you are thinking about your new idea, skip the vitamins, and start out with the medicine.